Pages - Menu

Wednesday, February 27, 2013

Nail Polish Removal Pen,Nail Caviar,Makeup Sponge & Nail striping Giveaway

This will be my very first Giveaway so I decided to give away a Nail Polish Removal Pen,Nail Caviar in Gold,Gold nail striping & two makeup sponges great for nail sponging,and these nail polish remover pens are great for getting into those tiny areas around the nail.Just pull off the bottom cap and put a few drops of polish remover to moisten.Starts 2/28-3/15/2013 
Rules
  1. U.S. only
  2. 18+
  3. You will have 48 hrs after I announce the winner to respond or prize will be forfeited.
THANKS & Good Luck!!!


a Rafflecopter giveaway

Blue and Green Gradient Animal Print

  1. I chose shades of blue & green for my gradient.
  2. Then I started with the darkest at the top.Pure Ice Celestial
  3. Then the next lighter shade Spoiled Distant Memory
  4. Then the lightest shade.NYC Skyline Blue at the tip of the nail.
  5. Then use your Art Deco nail art brush in black for the animal stripes.
  6. Then finish off with a glitter to match.Rue Beaute'.No shade is listed on the bottle,however it's filled with green/gold & blue glitter.
  7. Viola♥Gradient Animal Print.


Tuesday, February 26, 2013

Flame Nails

  1. I started with my base color black.
  2. Then apply your yellow to the ends,and it doesn't have to be perfect.
  3. Then taking your yellow again start creating thick whispy lines upwards.
  4. Then take your orange and place inside the yellow trying not to fully cover the yellow.
  5. Then your red doing the same thing.
  6. Viola♥Flame Nails


Monday, February 25, 2013

Rainbow Animal Print

  1. Choose 4-5 bright colors.
  2. Apply a base coat.I chose Spoiled "Tattle Tell"because it's somewhat sheer with a nice shimmer.
  3. Then start with your next color.I chose orange.
  4. Then Pink
  5. Green
  6. Then Purple/Pinkish
  7. Then take your art deco nail art brush in black and make your animal print stripes covering the edges of the colors
  8. Then top it off with a shimmer top coat.
  9. Viola♥Rainbow Animal Print


Sunday, February 24, 2013

Strawberry Nails

  1. Start with a red base.I chose NYC"Broadway Burgundy Frost"due to the fact it has a nice shimmer and I did not need a top coat.
  2. Then using a small nail brush or Art Deco in green to create the stem.
  3. Then using a dotting tool apply your white at the tips for the whipped cream.
  4. Viola♥Strawberry Nails covered in whip cream.


Saturday, February 23, 2013

CrissCross Nails

  1. Start with your favorite base color.I chose NYC "Skyline Blue"
  2. Then using a small nail brush or use one from L.A.Colors Art Deco,which work quite well.
  3. If your not too great at creating straight lines try setting your brush on the edge of the nail,and instead of moving the brush try rolling your finger from left to right or visa versa while holding the brush down.This works great.
  4. Then create lines going the other way.Then too finish it off tip the ends.Viola♥Crisscross Nails


Friday, February 22, 2013

Camo Nails

  1. I chose L.A.Colors "Circuits/Black,The Color Workshop"Basic brown" & NYC"Skyline Blue",and you'll need a dotting tool or a small nail brush.Using a dotting tool I found is easier to manuever.
  2. My base coat is Wet n Wild "Sage in the city" which I love this shade of green.
  3. Then using your dotting tool make random splotches on the nail.I started with the blue.
  4. Then brown.
  5. Then black
  6. Then I applied my clear coat from NYC Viola♥Camo Nails


Thursday, February 21, 2013

Two Toned Leopard

  1. Start off with two black base coats.
  2. Then using your the lighter shade L.A.Colors(Mega Watt)apply over your black only on the inside of the nail,and going to the edges.
  3. Then using your black create C's 
  4. Then fill in the C's with your next shade brown.
  5. Viola♥


Wednesday, February 20, 2013

Newspaper Nails


Newspaper nails is a super easy way to create art on your nails.First cut out the part you'd like from the paper.Then you can either use mouthwash or rubbing alcohol to soak each finger for about 10-15 sec.Then place the paper down on your nail pressing hard trying not to move it for about 20 sec or longer,otherwise the print will smear.Peel off gently and gently apply a clear. Viola♥Newspaper Print Nails♥


Tuesday, February 19, 2013

Stained Glass Nails

This is my first attempt creating the stained glass look on my nails,and I thought I did pretty well.You definitely need a steady hand which in fact I do not have,and patience which I don't have much of that either.

  1. First start with your choice of colors and you'll need a dotting tool.I chose my largest one.
  2. Choose a base coat or a clear coat will work.It'll be covered anyways.
  3. Then create random dots or shapes.Some dots I made bigger than others,and try to put your colors fairly close to each other.
  4. Continue with each color.
  5. Cover most of your nail with different dots and shapes.Let it dry completely before starting your outlines with black.
  6. Then using a nail art brush,draw lines around your colors to separate.What I found worked great is the brush from Art Deco.Just clean it off with some polish remover and dip into your black polish.I happen to not have a art deco in black so I used the brush from the green.This brush is perfect for going around colors and creating thinner lines.
  7. Viola♥Stained glass nails


Monday, February 18, 2013

More Polka Dots

What can I say I love creating polka dots,and they're so easy to create with your dotting tools.
Basically I started with a lighter base color Spoiled(Toad-ally Amazing)Then using the darker shade Spoiled(Distant Memory) to create my dots.Start at the top of the nail,and go around the edge of the nail to the tip.Then with the next row use a smaller dotting tool.Viola♥


Sunday, February 17, 2013

Flower Nails


Flowers are cute & easy to create on your nails.

First start with the 4-5 colors of your choice.Then with your dotting tool or a toothpick place 4-5 dots in a circle depending on the size of your dotting tool.Then place a dot in the middle.Viola♥Flower Nails


Friday, February 15, 2013

Get Spoiled with Spoiled

 So I went out and purchased two more shades of Spoiled by wet n wild since they are still on sale at CVS for 2/$3.Then with my coupon for $1 off makes them 2/$2.Sixty seven shades left to go.
 Love the name of this one "Toad-ally Amazing"
Definitely needs another coat.
 Two coats covered nicely.More shine with this one and a bit of shimmer.

This one is a much deeper,darker shade "Distant Memory"with a touch of shimmer.
The color here is lighter than the actual shade.Just one coat covers quite nicely,however it dries a little flat with a tad bit of shine.
Two coats
In this pic the shade appears even lighter.It must be my camera.Guess you'll just have to see for yourself!
Love the shade♥


Follow my blog with Bloglovin

Thursday, February 14, 2013

Gold Bold Nail Design

  1. First choose your base.I chose Maybelline Color Show "Gold Bold"metallics which covers in one coat,love the color.
  2. Then tape off like shown in 2,3,& 4 for your V's
  3. Then apply your black.
  4. Gently peel off your tape.
  5. Then with a long,thin nail brush free hand your stripes or lines.
  6. Viola♥


Wednesday, February 13, 2013

Wet n'Wild Spoiled

Spoiled from Wet n Wild offers 72 awesome shades at only $1.99.Plus right now Spoiled is on sale at CVS for 2/$3.00,and with your $1 off coupon from the redplum coupon booklet making these 2/$2.So I purchased the first three that caught my eye.Sixty-nine left to go!
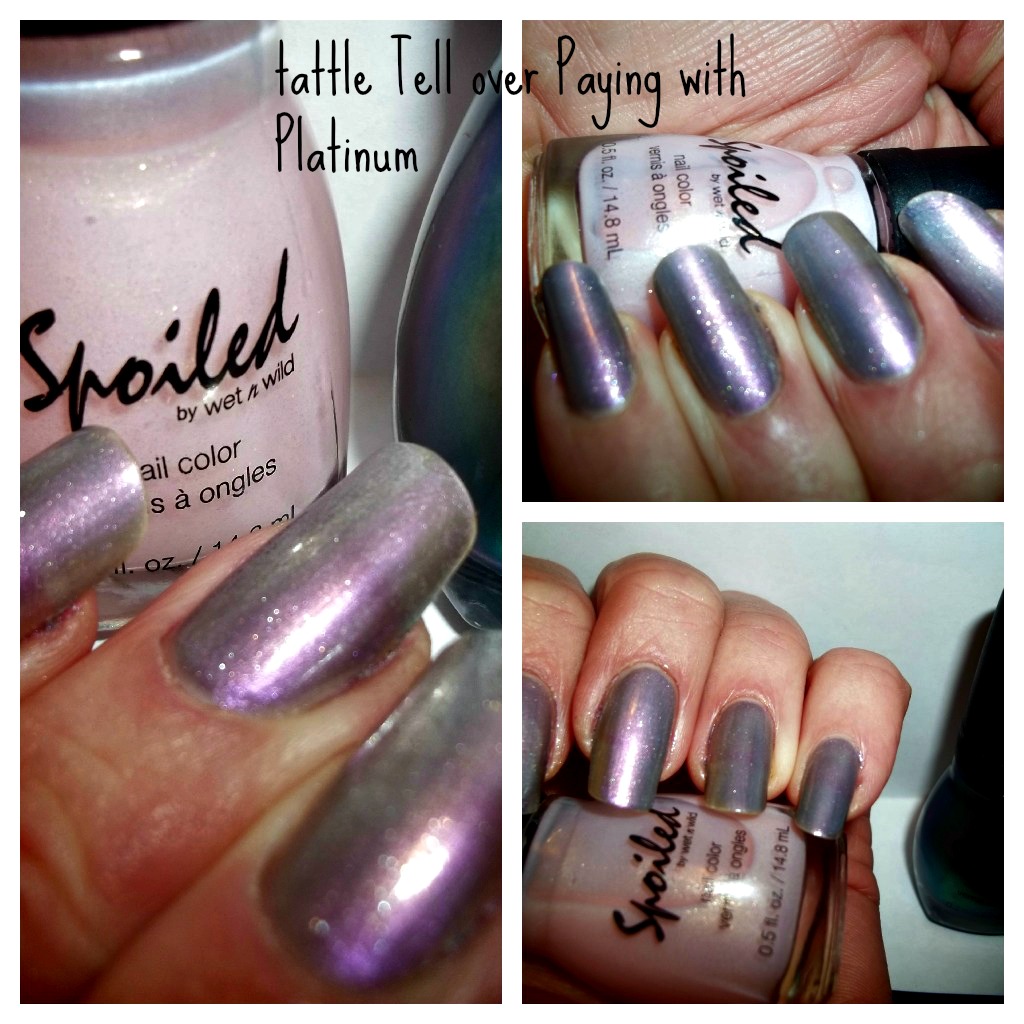
Paying with Platinum is an awesome shade.It looks green then purple.I love the shades that look like one color one way and another color another way.
Shade "Tattle Tell" a almost sheer polish with lots of shimmer.Love it♥

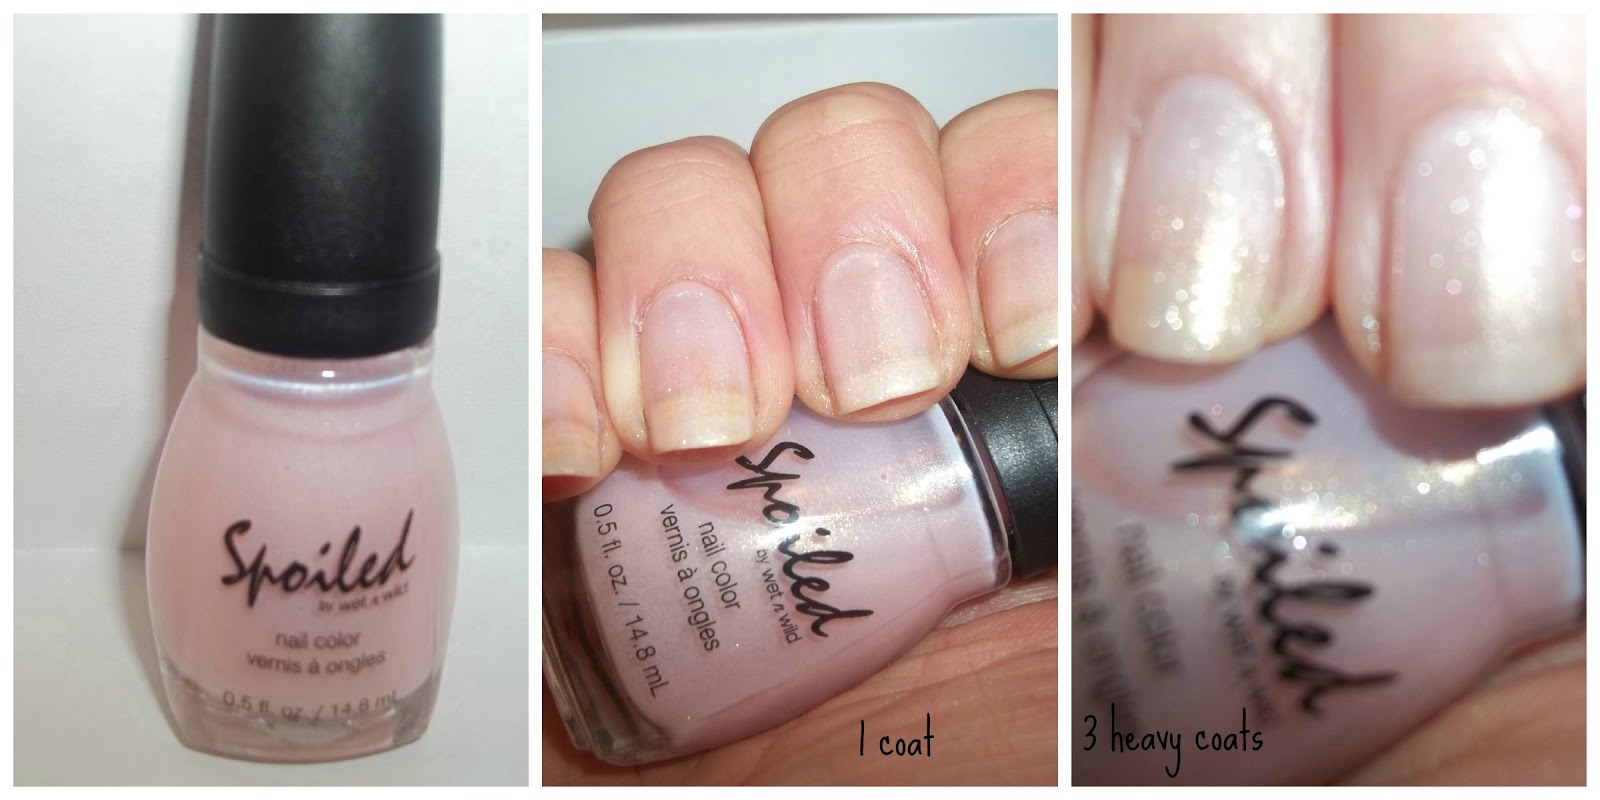
Shade "My Button Fell Off" This polish went on a bit streaky at first with the first coat.It took three coats for complete coverage.It almost  looks white,however it's a very pale shade of pink.